
8 Fresh and Stunning Card Making Ideas!
Below are some fresh ideas and some new takes on old papercraft and card making inspiration to hopefully inspire you to make a start on your next amazing card.
1. Markers and Coloring Books
2. Magazine or Book Pattern Pages
3. Colorful Ink
4. Quaint Accordion Card
5. Watercolors or Acrylics
6. Paper Scraps
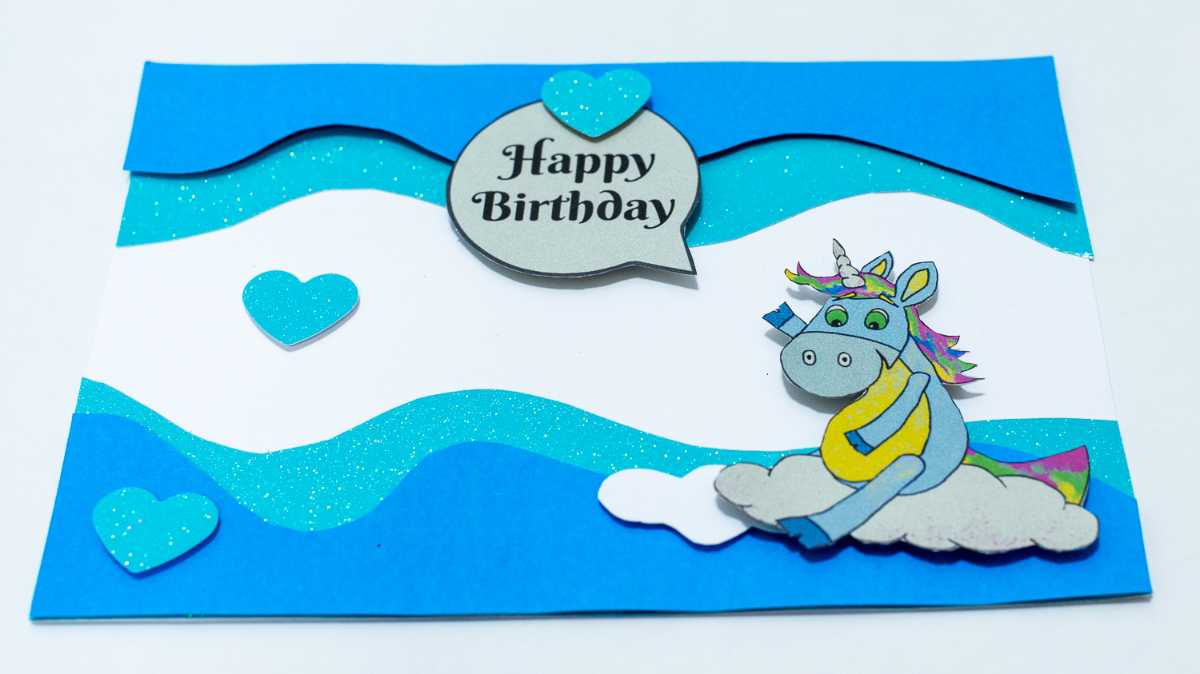
7. 3D Embellishments
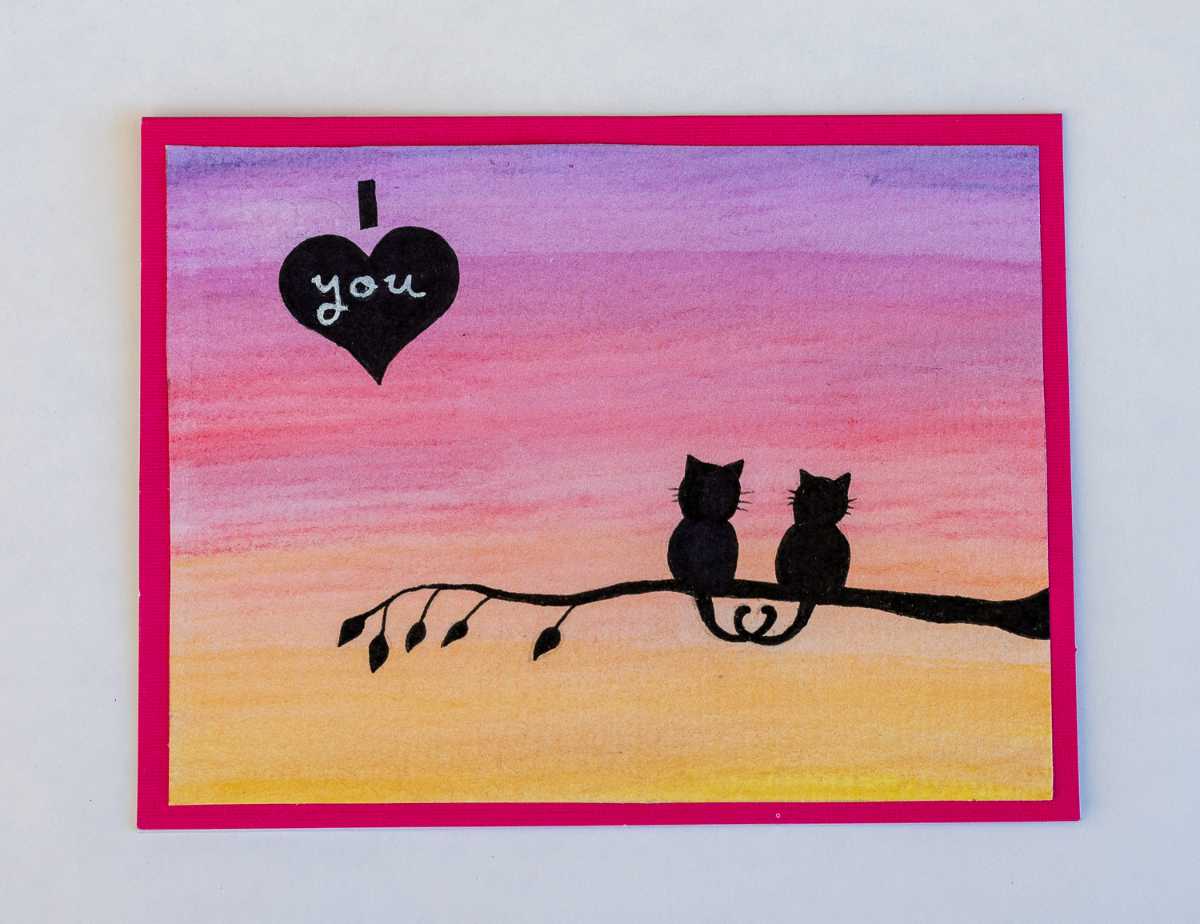
8. Silhouette Card
Get Creative With Different Markers and Coloring Books
Cut and Glue Creative Magazine or Book Pattern Pages
Boost Your Craft With Colorful Ink
As you can see in the example below, I have included the words in the lower third of the page. Using the rule of thirds is a fantastic design technique that we'll talk about another day.

Make a Quaint Accordion Card For Any Occasion
Get a rectangle-sized cardstock 28cm wide x 11.5cm in height. Score the card vertically at 4cm, 8cm, 14cm, and 20cm.
If you work in inches, your rectangle cardstock will be 11in wide x 4.5in height and your scores will be at 1.5in, 3in, 5.5in, and 8in.
Now, it's time to take your scored piece of card and fold it like an accordion. This means that you fold each score in the opposite direction leaving you with five distinct panels.
Once folded, you should see three panels as in the example below. Focus your styling on panels one, three, and five as these are the panels that are seen when the accordion is folded up.
I adore accordion style birthday card ideas because it's super versatile and will be appreciated by both adults and kids alike.
There is also plenty of room on panels two and four to write a lovely birthday message. If you include an overhanging piece or tags like in the example below, just make sure you don't accidentally glue it to the adjoining panel when sticking it on.

Making Simple But Stunning Backgrounds With Watercolors or Acrylics

For the mountains, keep one face white to represent snow, and on the other side add some shadow.
Once your masterpiece is dry, trim as appropriate and adhere it to the face of your card with a beautiful message.
Use Your Paper Scraps for DIY Christmas cards
Just stick your scrap pieces in odd-shaped strips on the front of your card as in the example below. It's a good idea to lay your pieces down first before gluing to make sure all the colors look great together and nothing is out of place.

Jazz Up Your Cards With Some 3D Embellishments
In the children's card example below, I pre-cut all of my pieces and spent a few minutes layering them how I wanted. This is really important as it's hard to fix mistakes without ripping or marking your paper once you have stuck something down.
Again, it's best if you don't ask how I know this!
Pre-cut lettering looks amazing using this technique on the front of your card so don't just confine the pop-outs to the imagery.
Tips in Crafting a Stunning Silhouette Card
The possibilities are endless here and can be tailored to the individual. Cat lovers may like my silhouette card below or a black silhouette of a couple sharing an umbrella in the rain makes for a beautiful Valentine's card also.
The background is just as important as the silhouette as it brings the pop of color. Don't be afraid to be bold! Use a DIY painted sunset or bright-colored card as your background.
The example below is made using Derwent Inktense pencils for the background and a stencil for the silhouette image.
Bored with your standard card layouts? Try making slimline cards!
I hope you have found some inspiration with this list of easy card making ideas, and I'm eager to see your take on these cards. Please do share your finished products with us. Happy card making!

