Six Jolly and Wonderful Christmas Card Ideas
Jingle bells, jingle bells, jingle all the way. Oh what fun it is to ride in a ... wait, how long have you been standing there? Um ... Making Christmas cards is just a mood on its own - no matter what month you're creating them!
It's just that I really, REALLY love Christmas. I love the kid's excitement, catching up with friends, indulging in Christmas lunch, enjoying a few days off, and I especially love the opportunity to make beautiful Christmas cards for my family and friends.
It never hurts to start building up a holiday Christmas card stash, so here are some holiday card ideas to get you started!
DIY Christmas Cards for Kids
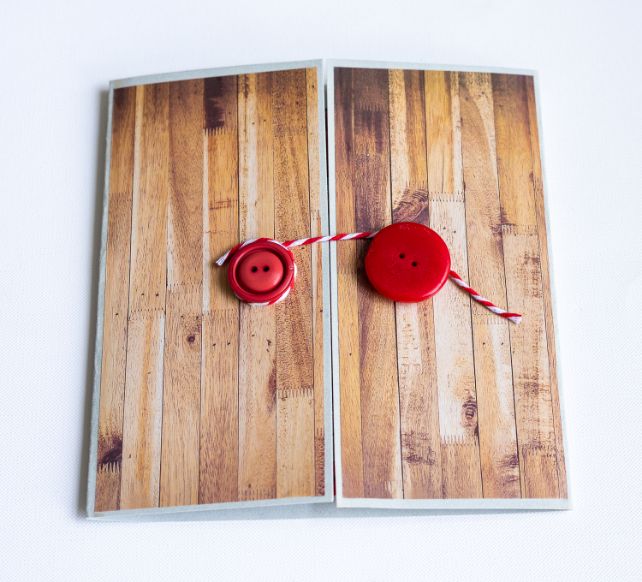
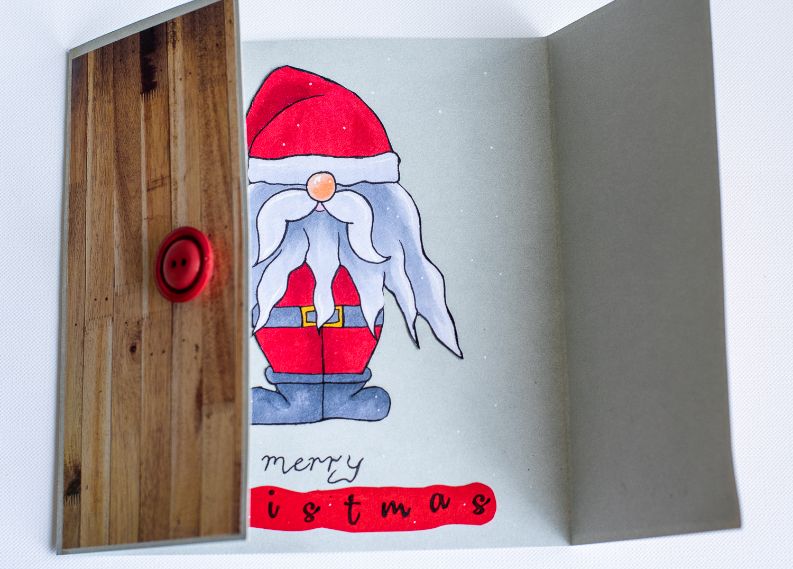
Making Christmas cards for kids is one of my favorite types of Christmas cards to make because you have the opportunity to embellish the card with fun and silly characters. Characters that most likely wouldn't be appreciated on an adult's card. Kids love opening things, touching the card, and surprises so a novelty card is perfectly suited to a child.
In the example below, I have created a card that looks like a door. Once the door is opened, it reveals a cute gnome-like Santa with a typical overgrown Santa beard. I have hand-drawn the Santa gnome as I had some new Copic markers I wanted to try out, but you could easily print out a Santa and cut/glue it on.
I plan to tape a small candy to the back of the door as a surprise!
White Christmas Silhouette Card
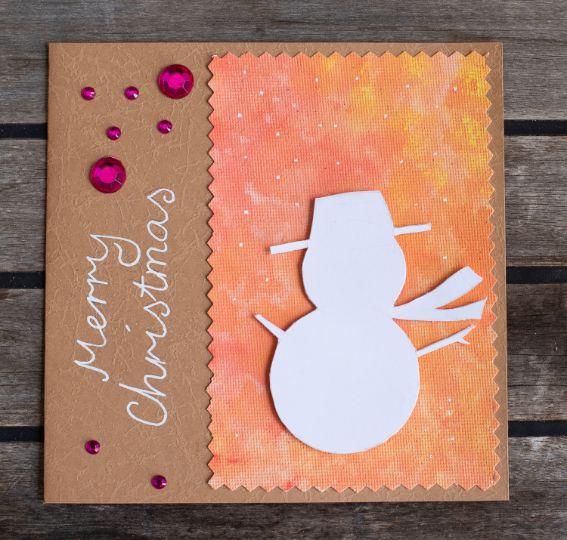
With a white Christmas theme in mind, I wanted to explore the idea of a silhouette card with a difference. In the example below, I have created an abstract background by using a sponge to dab watercolor paint on some painting paper. Once the sponged paint background had dried, I cut it out smaller than my cardstock Christmas card and glued it on.
The snowman was hand-drawn onto some white cardstock and cut out carefully with a craft knife. However, if you have an electronic die-cut machine, go ahead and use this instead! I wanted to make the snowman really pop against the abstract background so it was stuck on with adhesive foam squares to lift it out a little.
Washi Tape Christmas Tree
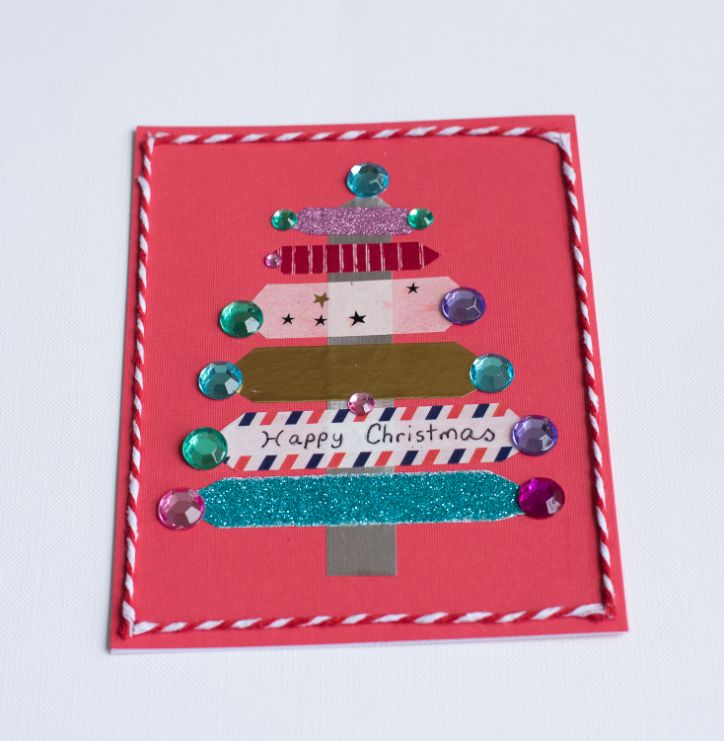
Who doesn't like washi tape? It's addictive, right? Well, I LOVE to buy washi tape but I should really use some of my existing tapes up before I buy some more. With that in mind, I created a super easy Christmas card made nearly entirely with washi tape.
The entire Christmas tree is made by laying the strips down in a vertical strip for the trunk, and a number of horizontal strips for the tree branches. The tree can be embellished however you please with any little odd bits and pieces you might have in your craft scrap box.
This Christmas card idea is a great one for kids to make themselves too!
Button Christmas Tree Card
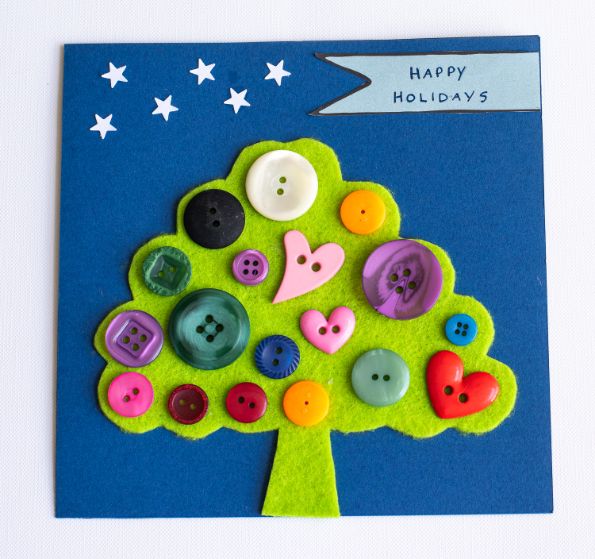
The button Christmas card is a different take on the theme of Christmas tree cards. I really enjoyed making this card as it gave me the opportunity to use some buttons, some of which are vintage, that I inherited from my Grandmother around 20 years ago. My Grandma was both a prolific crafter and a hoarder and as a result, I have a huge box of buttons and other crafty pieces in storage that I can't bring myself to throw away.
The Christmas tree base was made from a scrap piece of felt which I glued onto the card first. Then came the fun part ... arranging the buttons in a pleasing matter. I'm not sure why, but this part of the project was strangely satisfying! Once I was happy with the buttons, they were glued on as well.
If you have more time up your sleeve than I did, the buttons would look great hand-sewn on using glittery thread as an embellishment!
Snow Globe Shaker Christmas Card
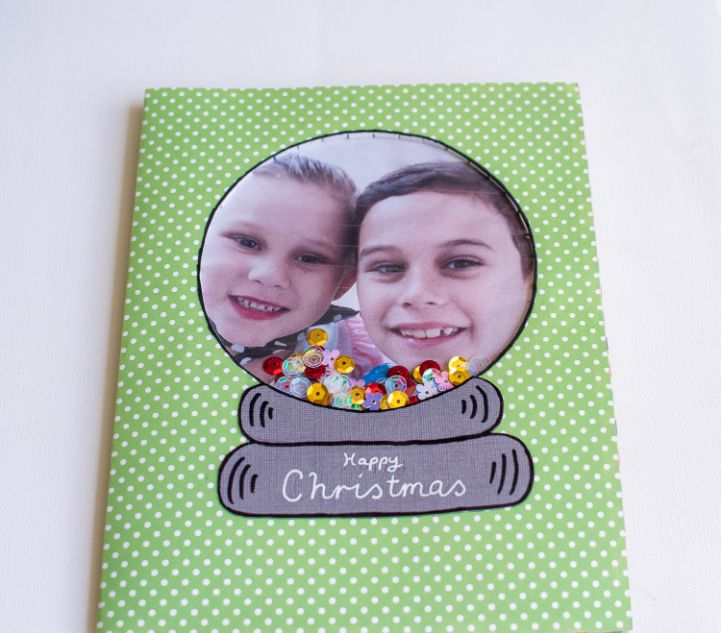
This card is a little more fiddly than the other Christmas cards and deserves its own detailed tutorial, which I'll hopefully have time for soon. It's basically a mock snow globe (without the liquid) and can be enjoyed by both adults and kids alike.
I started by cutting a round circle hole in the front of the card which represents the snow globe. The base of the globe was constructed from cardstock and glued down under the round hole on the front of the card.
To create the actual snow globe shaker feature, I attached a circle made from clear plastic slightly larger than the hole on the inside front of the card. Still working on the inside front, I then laid down a strip of double-sided foam adhesive around the edge of the snow globe and tipped in some craft gems and jewels. These act as the ''snow'' in the shaker snow globe!
Next, I adhered a photograph to the other side of the double-sided foam adhesive and made sure to line it up so that the photo could be viewed through the ''snow globe'' on the front of the card.
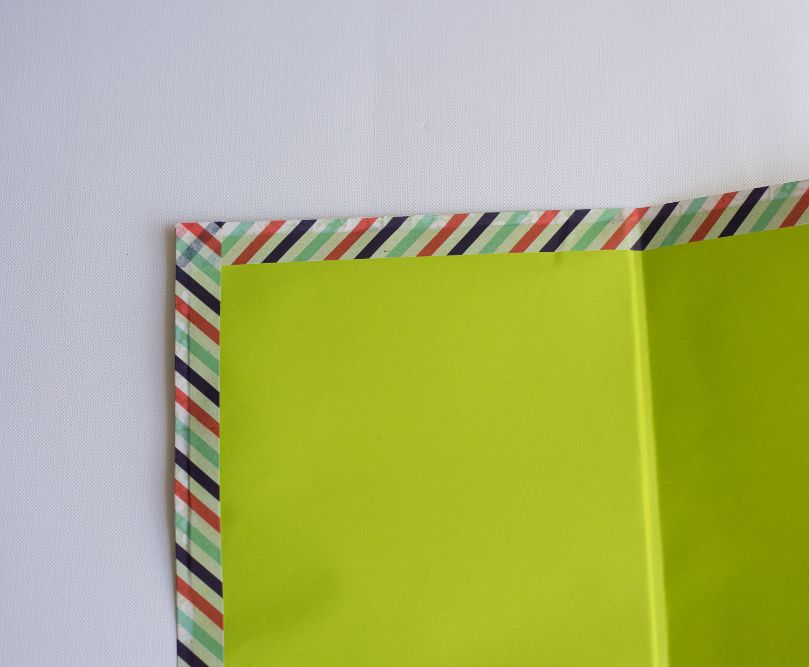
To finish it off, I covered the inside of the card with a larger piece of plain paper and used washi tape to make a pretty border that holds everything in place and hides the back of the snow shaker globe.
Easy Peasy Christmas Card
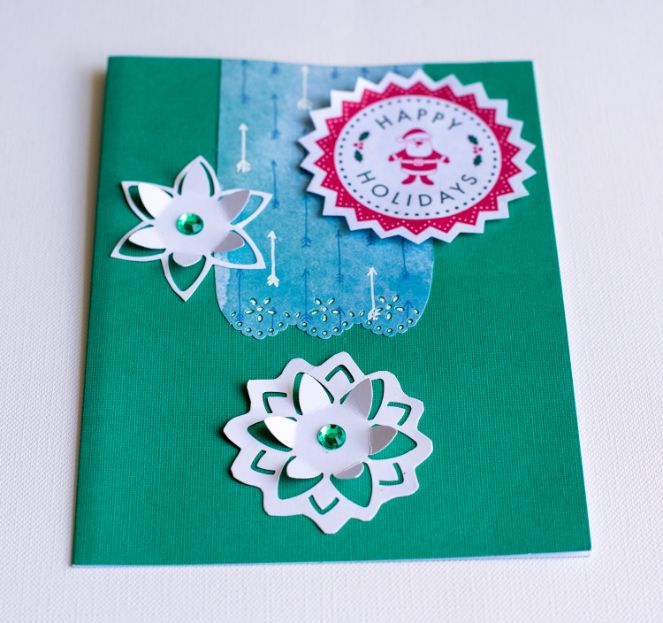
I was recently given some craft punches that were no longer being used by their original owner and I desperately wanted to make a card to try them out. They were shapes I didn't already have so I was pretty keen to see what I could make with them!
The below Christmas card is an easy peasy project using various card-stock shapes, some of which were cut using my lovely pre-loved craft punches. I laid down the various pieces first and experimented by moving them around until I found a result I was happy with before gluing them down.
I really hope that you have found some Christmas inspiration with these Christmas card ideas and would absolutely love to see your interpretation or versions of them. I can't wait for the Christmas season again! Happy card making!
Seen Our Sister Site?
Check out ScrapbookingCoach.com by clicking here.
© Copyright 2025 - CardMakingCollective.com
