5 DIY Card Embellishments You Need To Try

Diy embellishment ideas to enhance your cards
Do you have a favorite thing to do when it comes to card making? Mine is creating DIY card embellishments. I loathe creating the card base itself but as soon as I get up to the embellishments, I really start to enjoy the whole process of card making.
To help you get started with your own card embellishments, below are five DIY card making techniques and embellishment ideas that you can incorporate into your card-making projects.

#1 - Use twine to make cute little circles

A beautiful card design using twines and die cut embellishment
This DIY card embellishment is really easy to make and can be used in so many ways. As you can see from the set of photographs below on the left, you will need some twine, glue, a circle cut from cardstock, and a cute little decoration to put on top.
Begin by marking the exact center of your cardstock circle with a dot. Next, cover the whole circle with glue, and starting at the dot, wind your twine around and around as per the photograph below on the right.
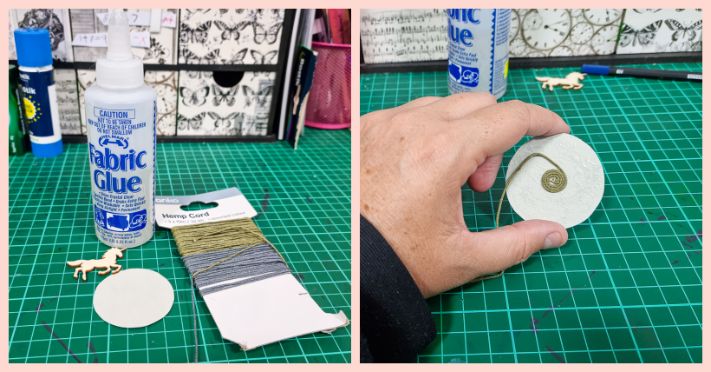
Keep circling and feel free to add more glue if you need it. I didn't work fast enough and had to reapply the glue as it dried up a little. When you finish, it should look like the twine circle in the set of photographs below on the right.
As the final step, stick something cute on top and use it on your card.

#2 - Use string to make a versatile embellishment

A beautiful sun ray card design embellished with cut out flower with string accent
Out of all the 5 card making embellishments listed, this one is probably the hardest to explain. As a result, make sure to take your time and follow along with the photographs provided.
To begin with, you will need some string, glue, a button, a piece of tape, and 1 x flower shape cut from cardstock with 14 "petals''.
If you have a craft punch to make the cardstock flower cut out, that would be amazing but don't worry if you don't ... because I didn't either. I just hand drew mine and cut it out.
I have created a rough one for the tutorial below and you will see from the photographs that I have written numbers on it.
You don't need to do this, I have just done this to help me explain and you will see in the final picture a little further down that I have made a much neater one for the final card embellishment.
The first step is to tape the beginning of your string to the back of your cardstock cutout to secure it in place, as per the photograph below on the bottom right.
Next, bring the string to the front side of the paper embellishment where indicated in the photograph below on the top right by the words ''start here.''

Now, skipping five ''petals'', bring the string down in the groove between #5 and #6 (see the photo below on the top left) and loop it around petal #6 clockwise to emerge between #6 and #7.
It's important to remember that when you make the loop behind the petals, it will always be made clockwise.
For the remainder of the string winding, you will continue in the same manner, but moving 2 petals clockwise at a time.
So now you will bring the string up to wrap around #2 and leaving five petals in between, will then wrap back down to #8. You will then wrap around #4 and #10 and so on.
Keep wrapping until the pattern looks complete, secure the end of your string with a piece of tape at the back and go ahead and glue your button in the middle to finish it off.
You can see in the photograph below on the right what it will look like finished and you will also see I used pointed ends in the final flower shape.
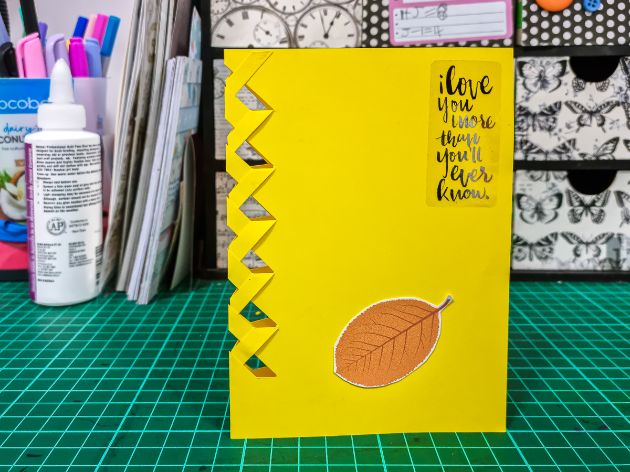
I ended up attaching this card embellishment to a card that I already made a little while ago however, I think these would look great as a Christmas tree ornament.

#3 - Get fancy with paper braiding
This card design was made using stickers for the title and simple braiding technique
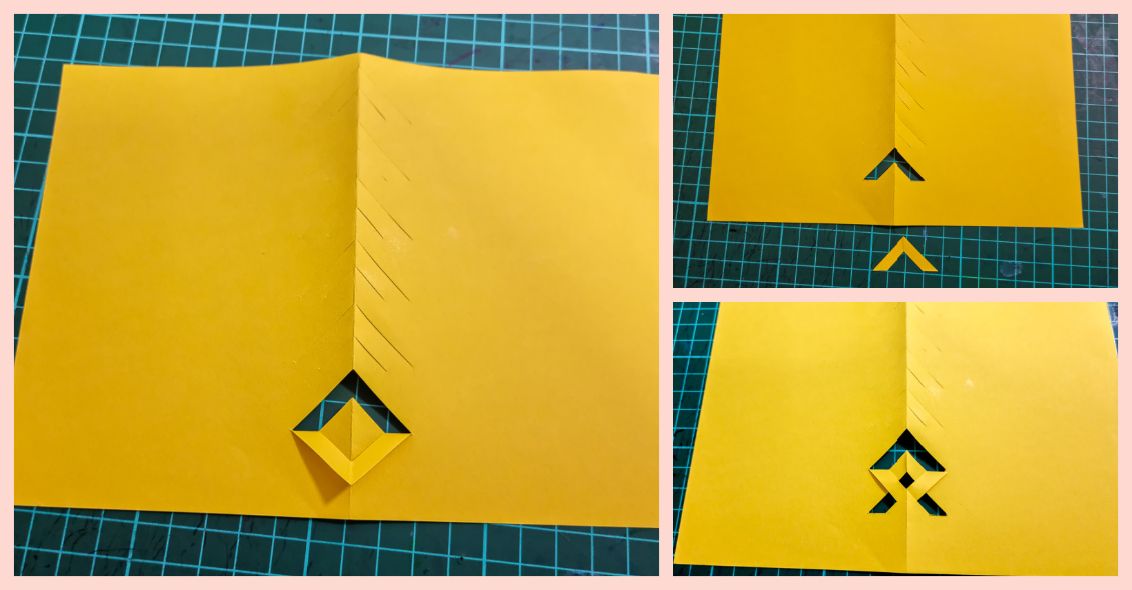
All you need to complete a paper braid is your cardstock base, a ruler, a pencil, and a pair of scissors.
In the photograph below on the left, you will see some pencil drawings on my cardstock base with some measurements.
You can copy these measurements and draw them on yourself but being honest, it's easier to do a quick google search on "card braiding template''.
You will find a few templates that you can just hold over the top of your card in which you just snip the lines using your scissors and discard the template.
So, you want to cut the line on the angle and leave the dotted horizontal lines alone, as they actually fold lines.
Once you have made your snips on the angled lines, when you unfold your card, it should look like the image below on the right.

Now, onto the fun part! As per the photograph below on the left, make your first fold downwards at the bottom.
For this one only, you are going to cut this little folded piece off (as per the photograph on the top right). It's very important that you do not throw this little piece away as you will use it later.
Next, fold the next flap down and tuck it under the little triangle sticking up from the first one. You can see how this should look in the photograph below on the right.
Continue doing this until you have braided all that there is to braid. It should look like the photograph below on the top left.
Next, take that little piece that you cut off and set aside earlier, and glue it to the top of the card (see the photograph below on the bottom left) to finish off the braiding pattern.
To finish the card off, fold it up and press down firmly onto the braided section to flatten out all the folds perfectly.
TADAAAA! It's pretty neat, right?

#4 - Make a tiled picture

Hand drawn art used as card embellishments
When it comes to DIY card making embellishments, this one is super simple. All you need is some basic card making supplies such as a card base, glue, scissors, ruler, pencil, and a picture that you like.
The picture can be one you hand-draw yourself, or it could be a picture you like from a book or magazine.
Measure and mark one-inch squares on the back of your picture and go ahead and cut these out. Make sure not to jumble them up if your image is abstract otherwise it may be hard to work out where they are supposed to go.
Next, glue your square tile pieces onto your cardstock base (see the photograph below on the right). You can measure if you like however I just eyeballed it.

5 - Level up your banner shapes

A card design embellished with stickers and paper cut outs
Banners are often used in card making to place words and letters on. However, they also make for great card embellishments and can be used in a number of different ways.
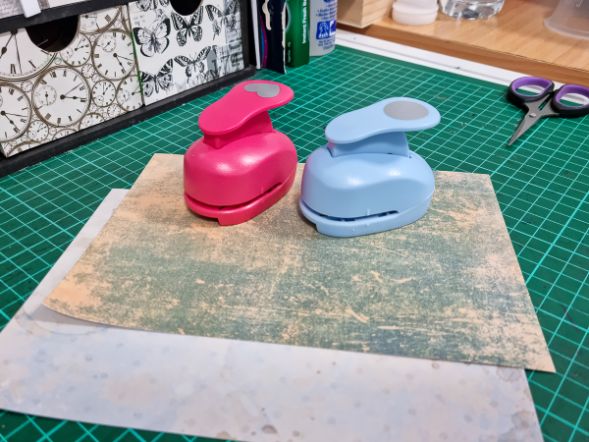
You don't need much for this particular DIY card embellishment, just a few pieces of patterned paper (scraps will work just fine) and a couple of craft paper punches.
As you can see from the photograph below, I used two sheets of card from a vintage mini-stack and both a heart and circle paper punch.
The photograph below shows the pieces that I cut from the vintage card. I hand drew the banners before cutting them out with a ruler and pencil.

Next, I adhered the circles on the straight edge of the banner with foam squares to give them a little pop.
The hearts were folded in two to make a simple butterfly heart shape and were glued onto the circles by running a small amount of liquid glue down the spine of the fold.
You can see from a few photographs back that I finished the card off with some letter stickers. Simple, yet effective!
I hope that you have found some inspiration from these five DIY card embellishment ideas. Do you make DIY card embellishments yourself? If so, I'd love to see what you have come up with.
Happy cardmaking!
Seen Our Sister Site?
Check out ScrapbookingCoach.com by clicking here.
© Copyright 2025 - CardMakingCollective.com